

Figure 1: Netting Needles
| Home | Equipment | Ropemaking |
Figure 1: Netting Needles
Netting needles are simple tools for holding and controlling string when you're making nets. The two most common shapes are shown in Figure 1, above. The top needle is mostly associated with fishing nets. The bottom one is very similar to a weaver's shuttle.
A coping saw does a good job of cutting the shape, but you can make a perfectly good netting needles with just a pocket knife. It just takes more time and patience.
Scrape or sand for a smooth surface. If you feel the need, add a coat of wax or varnish to prevent snagging your netting string.
I've made needles from Oak (Quercus rubra), Dogwood (Cornus florida), Osage Orange (Maclura pomifera), Black Walnut (Juglans nigra), and a couple I can't identify any more. Antique examples are also made from bone, ivory, horn, and sometimes, in later years, metal.
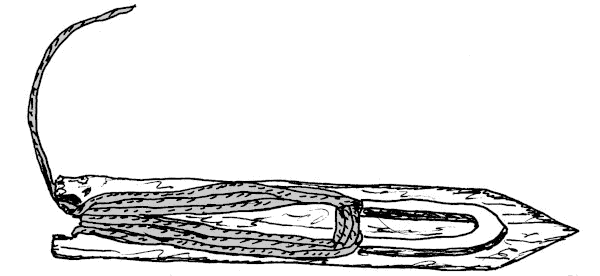
Figure 2: A Partially Filled Netting Needle.
For the upper type netting needle, slip a bight of twine over the center prong, then run the twine under the bottom notch to the other side, put another bight over the center notch from this side, then back down under the center notch, and so on.
For the lower of the two needles in Figure 1, the obvious thing to do is wrap your line along the length of the shuttle, between the end notches, as in Figure 3, below. This works, and is a perfectly satisfactory method.
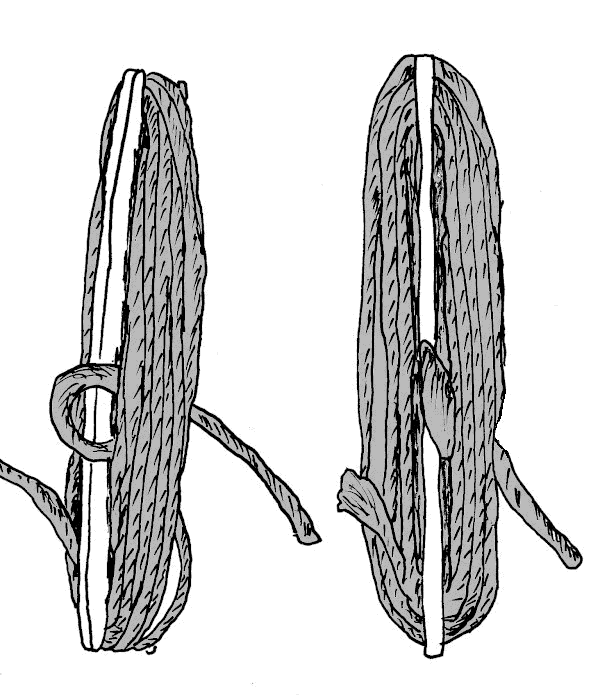
Figure 3: Shuttle with Twine Wrapped Along the Center.
The other method consists of wrapping figure eights around the sides of the shuttle as in Figure 4.
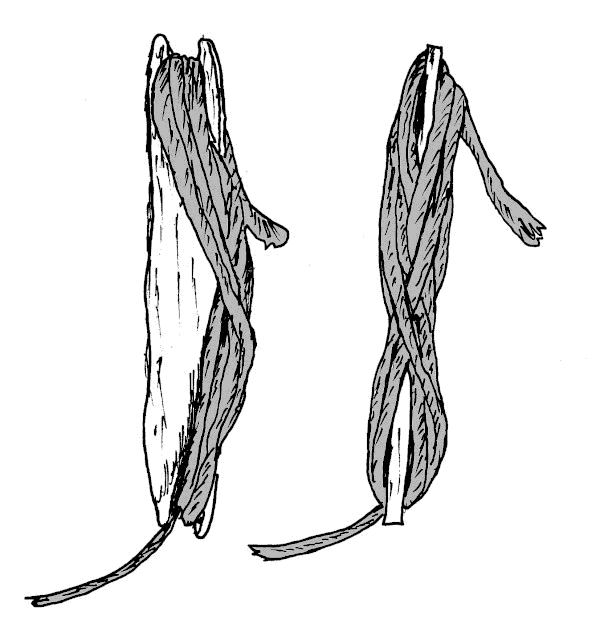
Figure 4: Shuttle with Twine Wrapped Around the Edge in a Figure Eight.
When one side of the shuttle is full, continue wrapping the other edge of the shuttle.
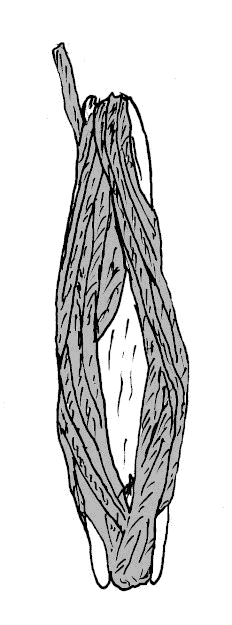
Figure 5: Shuttle with Twine Wrapped Around Both Edges.
As you can see from the pictures above, the way you wrap changes the shape of the full shuttle. The first version is round and fat, the second is wide and flat. Experiment with both methods, see which works best for you. I haven't settled on the one I like best. Yet.

Figure 6: Long Netting Needle.
In order to get the most yarn in the smallest cross section, some needles are long, with narrowed sides. The needle in Figure 6, above, is over sixteen inches long.
| Colophon | Contacts |