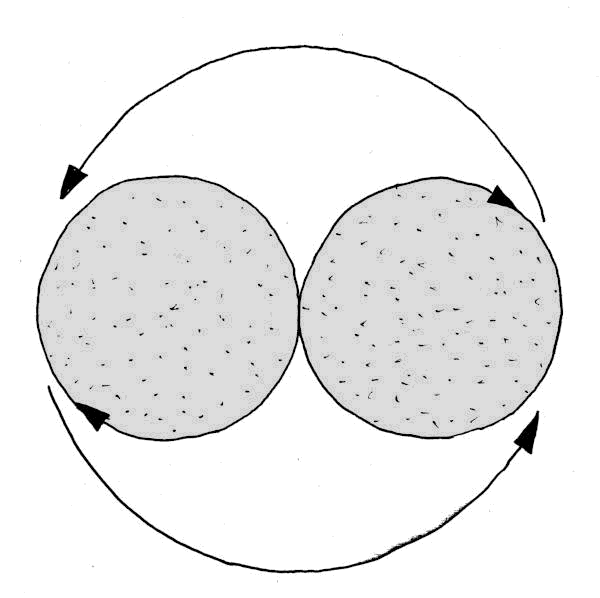
Figure 4.1: Two Strands Twisted Clockwise, Wrapped Counter-clockwise.
| Chapter 3 | Introduction | Chapter 5 |
Two strand rope is easy to make; you twist one strand in each hand, both hands twisting in the same direction. Then you wrap the two strands around each other, in the opposite direction.[805] [130]
Figure 4.1: Two Strands Twisted Clockwise, Wrapped Counter-clockwise.
Figure 4.1 shows how the twisting of the two strands, clockwise in this case, is balanced by the wrapping in the opposite direction.
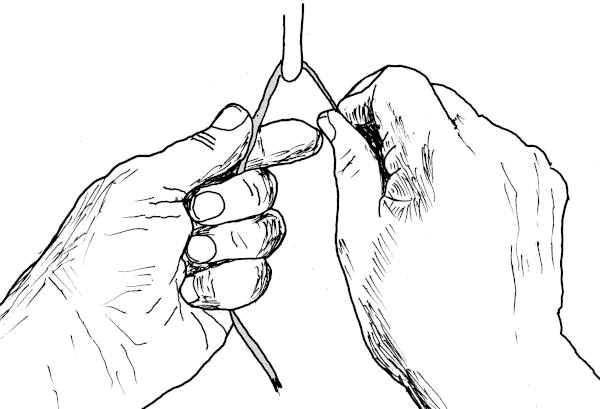
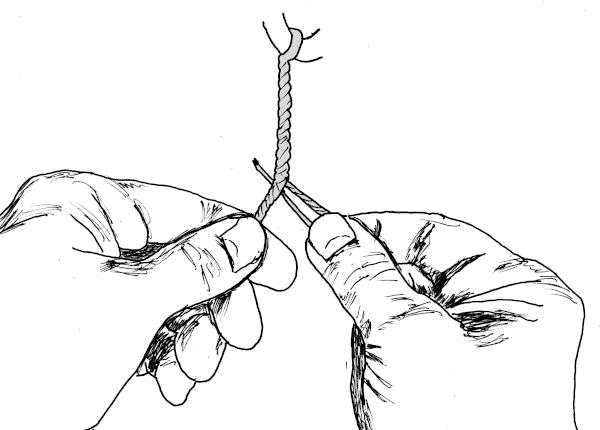
Figure 4.2: Anchoring Fibers.
The easiest way to start twisting is by looping a wisp of fibers around a fixed object. A hook on a bench, a nail in a post, branch of a tree, a friend's finger, your big toe. Do not center your fibers on the hook, but rather make one side twice as long as the other. This lets you add more fibers on one side without creating a weakness on both strands in the same place.
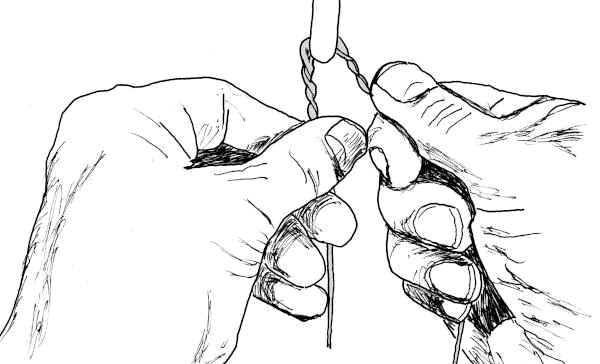
Figure 4.3: Twisting Each Bundle in the Same Direction (Clockwise or S Twist).
Twist each strand individually in the same direction. In Figure 4.3, the twist is clockwise, making an "S" twist. You can twist the other way if it is more comfortable.
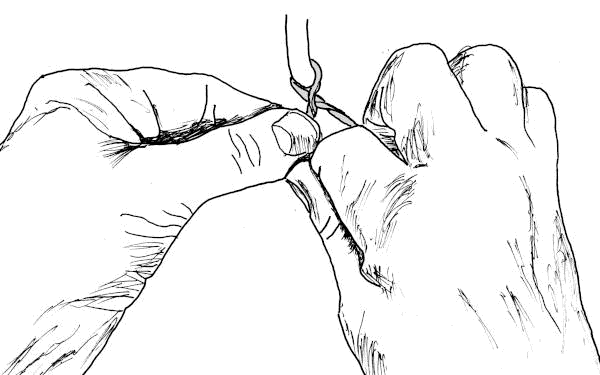
Figure 4.4: Wrapping Bundles in Opposite Direction (Counter-clockwise or Z Twist).
Next, wrap the two yarns around each other in the opposite manner. If you twist with an "S" twist, wrap the right yarn over the left yarn, making a "Z" crossing. Then another set of "S" twists, and a "Z" wrap. Another "S" twist and another "Z" wrap, "S" twist, "Z" wrap, until your rope is finished, you've run out of fibers, or you run out of patience.
If you started with "Z" twists, be sure you wrap in the "S" direction.
When you notice one bundle getting short, or thin, it's time to splice in additional fibers.
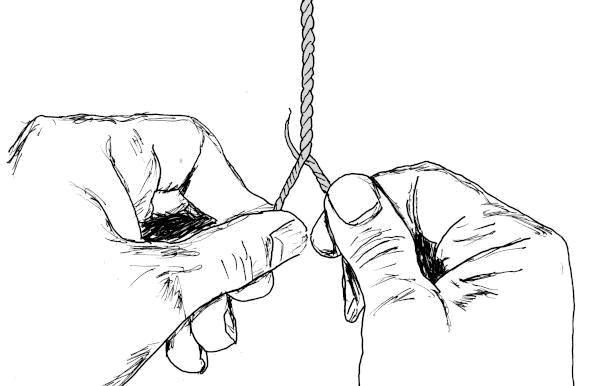
Figure 4.6: Twisting in New Fibers.
There are several strategies for adding the new fibers.[290] For the simplest splice, just lay a few new fibers alongside the yarn that needs them. Make sure the free ends of the new fibers are tucked under the other yarn, so they don't pull free when you twist the yarn, as in Figure 4.7, below. Then continue twisting and wrapping like before.
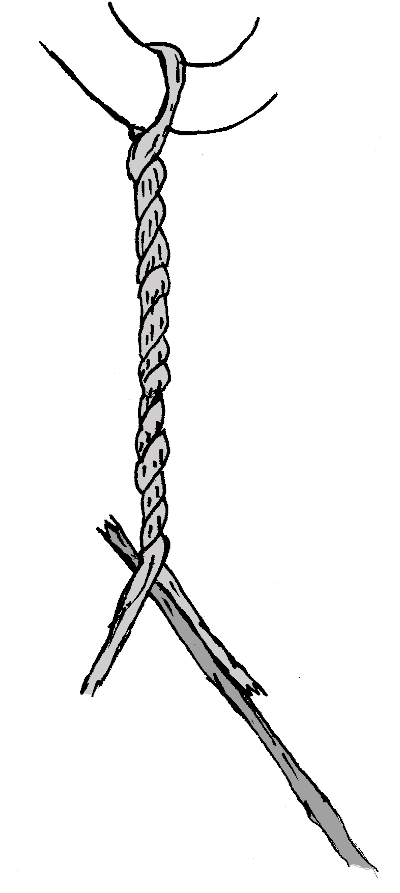
Figure 4.7: Continuous Splicing.
You get a smoother, more uniform cord if you make thinner additions more frequently, rather than waiting to add a big bunch when you are approaching the end of the yarn.
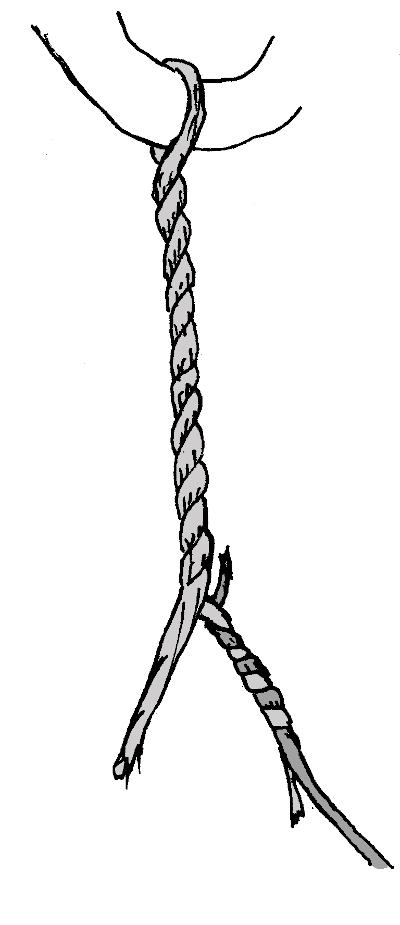
Figure 4.8: Ends Splicing.
If you do find yourself near the end of a yarn, just twist the free end of the new fibers with the end of the old yarn, as in Figure 4.8.
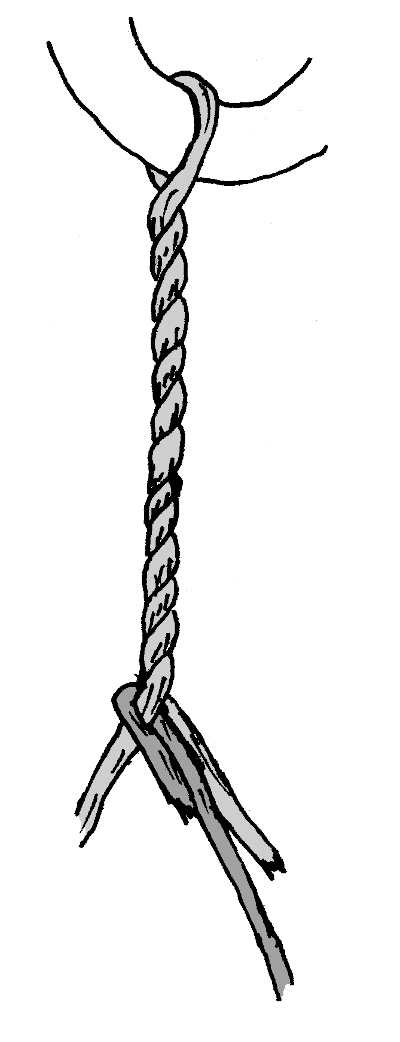
Figure 4.9: Looped Splice.
You can also loop the end of the added fiber around the second yarn, and twist both parts of the new bundle in with older yarn. This will make a short lump on the one yarn, but it is a secure splice. Figure 4.9.
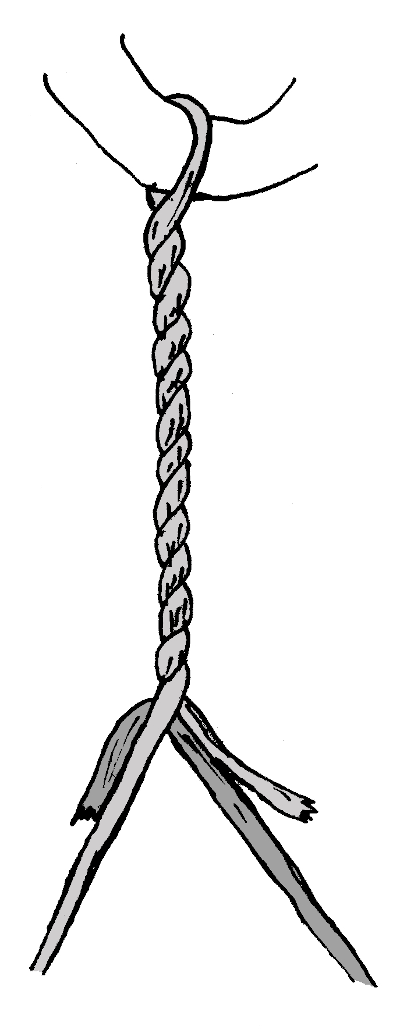
Figure 4.10: "Y" Splice.
Finally, you can anchor the free ends of the new fibers under the other yarn, like in the continuous splicing in Figure 4.7, but this time, fold the ends down alongside the other yarn, and twist them in when you twist that yarn, as in Figure 4.10.
The last two techniques twist the starting ends of the added fibers back into the main cord, leaving fewer loose ends.
You can always just ignore the ends sticking out, and they will eventually wear off. But maybe they will snag on something when it is most inconvenient. Something to remember if you are making rope for snares or hauling.
In palm twisting, two yarns are twisted simultaneously at one edge of the hands by rubbing the hands one direction, then wrapping the yarns with the backwards rub. The videos of ropemakers in Japan and Mongolia show how it's done. I haven't found descriptions of this technique in any of the early American texts.
Thigh rolling [055] [200] [265] [290] [295] [500] [670] is well documented as a technique used by the Native Americans, and interestingly, the Native Australians. From demonstrations I've seen, this works best on a bare thigh (hairy legs cause problems) or, a far less superior method, on damp denim.
Figure 4.11: A "Twist" of Tobacco.
You'll notice the twist is actually a two-ply cord. Most often this is an "S" twist, but "Z" twists are not uncommon. Preference of the twister no doubt.
| Chapter 3 | Introduction | Chapter 5 |
| Colophon | Contacts |